
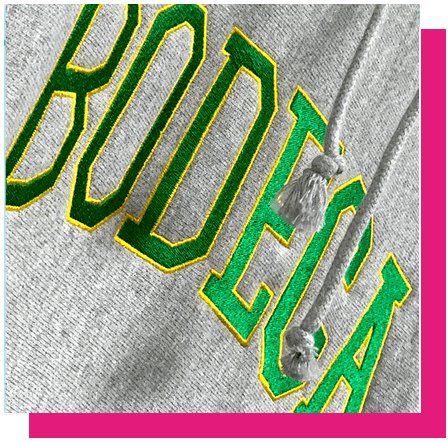
Embroidery is another popular service we offer and is known for its professional look and classic appeal. This makes it a great choice for corporate, high-end private label, or collegiate apparel. Common applications of this process include polos, jackets, sweaters, sweatshirts, hats, and bags.
The first step in the embroidery process involves converting your artwork into stitches. This is a process called “digitizing” and it involves a one-time (digitizing) fee based on the total number of stitches in your graphic. A higher total stitch count merits both a higher digitizing fee and a higher price per embroidered location, whereas a lower total stitch count would make for both a lower digitizing fee and a lower price per embroidered location.
When putting together your artwork to be stitched onto the apparel or accessory of your choice, there are a few points to consider before submitting your design for production.
For an optimal result with your embroidered graphic, follow these guidelines:
- Use all solid colors
- Avoid halftones, gradations, and fades
- Enlarge areas of small detail for a more accurate embroidered result
- If possible, provide specific (PMS) pantone values for each color (optional)
- Do not attempt to embroider photographic images
- Textures are generally not recommended. Hair, fur, or metal-looking surfaces, for instance, can deviate significantly from the originally intended result by appearing solid and not detailed.
- You can only get so much detail with thread, so the bigger you make the graphic, the more probable it is that the end result will match what you wanted.
ARTWORK
Create and send you artwork in either a vectorized format (ai, pdf, or eps) or a rasterized format (psd, pdf, tiff, or jpeg) that is sized approximately as large as you’d like it to be imprinted and set at a resolution of 300 dpi before you start designing. If you design you graphic on a small canvas and at a lower resolution, you can’t simply change the resolution to 300 dpi and get a high detail file. Altering the settings for your image size/canvas space to life-size dimensions and resolution to 300 dpi needs to be done BEFORE you begin designing. Starting with the canvas space sized correctly and the resolution set at 300 dpi before you design will improve the quality of your imprint.
© Copyright 2024 All Rights Reserved